Today’s topic is related to replacing and installing the belt of the drum. In the first part of the video, there are five detailed steps of how to replacing the calendar blanket while in the second part of the video, technicians in the video will show you how to install the calendar blanket step by step.(https://youtu.be/8zvgqeF7pEo)

The following is details: How to replace the belt The following is the sequence of removing 5 shafts.
Firstly: you should move belt shaft. Remove transmission shaft, and then remove chain. After that, you should take the screw out and remove the cover, and then take out 2 screws and remove the bigger sprocket. Then unscrew these 2 screws and remove the smaller sprocket and take 4 screws out. After that, you should unscrew the 2 screws of cover to remove it. Finally, you should loosen 2 screws of the bearing hold on the roller and put it out from the other side.
The second step: is to remove alignment shaft. You should unscrew lead screw. If it is stuck, you should move main motor to leave space for removing it. Then you should take out screws of main motor, move motor and take out lead screw. Loosen 2 screws of the bearing which close to the lead screw in the case of other side. Unload the 2 shafts of tissue paper. Hold on alignment shaft from the side of control panel and pull it out from the side of oil tank. The third step is to remove pressure roller. You should unscrew air cylinder of the left side, that is, the side of oil tank and then unscrew air cylinder of the right side, that is, the side of control panel. Hold on pressure roller from the side of control panel and pull it out from the side of oil tank.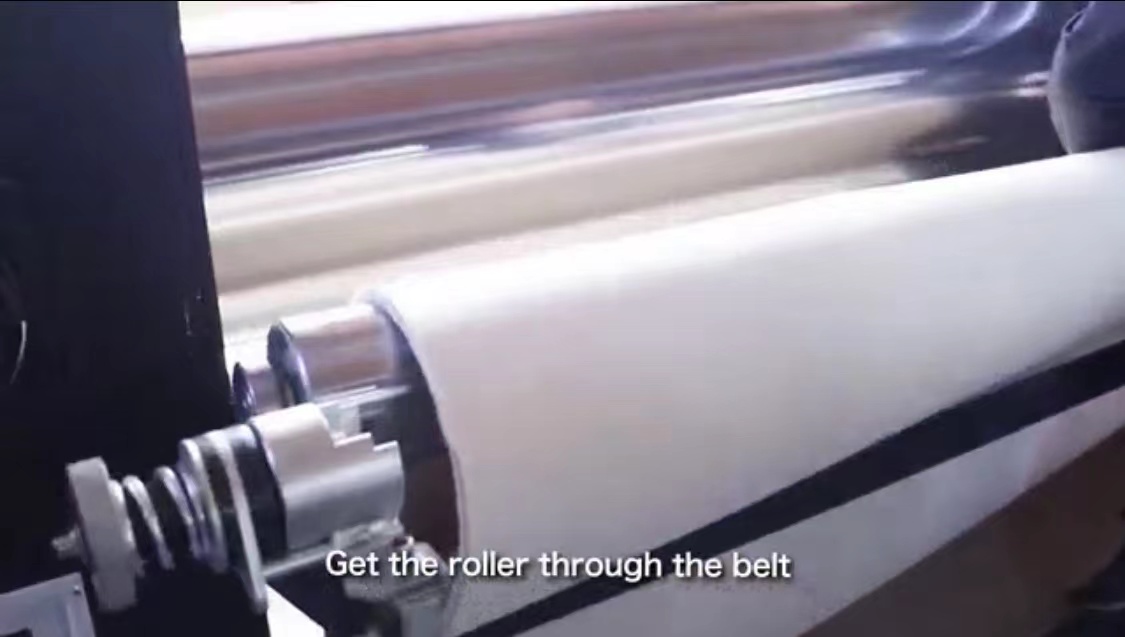
The fourth step: is to remove stationary shaft. You should take out screws of the left side and take out screws of bearing of right side. Hold it on at the right side and pull it out from left side.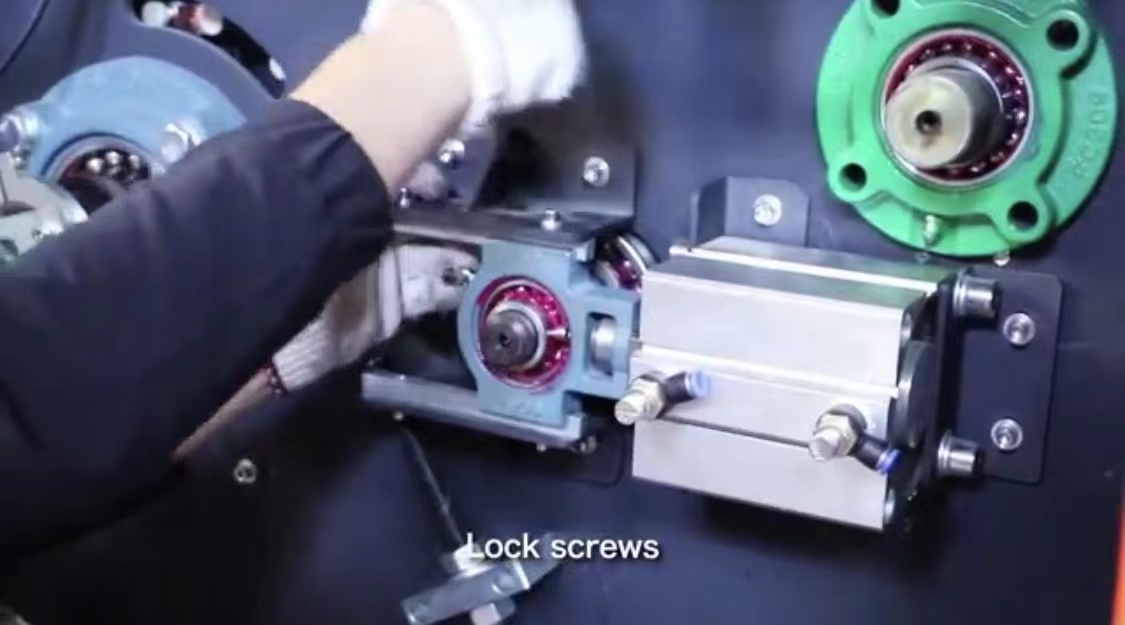
The fifth step: is to remove the shaft of moving belt. Open the door of left side and take out limited switch. Take out these three screws and loosen one screw. Then open the door of right side and take out these three screws. Then remove the 2 metal pieces of racks at left and right side. Remove the sensor and pull out racks of both side at the same time. Take out racks of both side and hold it on and pull it out from one side.
How to set up belt The following is the sequence of assembling 5 shafts.
The first step is to assemble the shaft of moving belt. Place the belt on the base of machine. Put belt on your thigh and get the roller through the belt. Then assemble the 2 racks to the roller and assemble them to the machine, and then lock the screws as well as screws in the right side. Fix the metal piece of one side and measure the distance between the head of rack and the end of machine. Besides, we should check if the distance between the head of rack and the end of machine is same with the other side. If the side is shorter than 3cm than the other side, move it towards front slightly and measure again. Assemble the metal pieces.
The second step is to assemble the driving shaft. Pull belt out and get the shaft through belt and load it into the machine. Then tighten the 4 screws and tighten the 2 screws of bearing of the other side of machine. Assemble cover of bearing and tighten the 2 screws of bearing. The third step is to assemble alignment-belt shaft. Get the shaft through belt and load into the machine. And then assemble the lead screw and tighten the 2 screws of bearing.
The fourth step is to assemble the pressure roller. Get the roller through belt and load into machine. Then assemble air cylinder and lock screws. Connect air tubes and tighten 2 screws of bearing. Tighten 2 screws of the other side of machine.
The last step is to assemble stationary shaft. Get the shaft through belt and load it into machine and then lock screws. Tighten 2 screws of bearing in each sides. Then assemble screws of main motor but not tighten them. And assemble the inner and outer sprockets as well as chains and the limited switch, sensor. Measure the height of left side and right side of alignment shaft and adjust the left lead screw to make it to be same height with right side. Belt is replaced now!
If you like our content, please subscribe our channel, write down your comments and give us a thumb up!
https://www.youtube.com/channel/UCPkerHZPHoBOnnNr6IQsO_g
See you next time, guys! If you are interested in digital printing, then please follow us, we will continue to bring you the latest news of digital printing. We look forward to your interaction with us!
You can go to the link to our company’s website: https://www.coloridoprinting.com.
You can contact us at email: joan@coloridoprinter.com; joancolorido@gmail.com
You can call us: (86) 574 8723 7913 You can contact us at M/WeChat/WhatsApp: (86) 13967852601